Building A Simple Web Application With Flask On Linux

Flask is a lightweight Python web framework that is well-suited for building simple web applications. It is easy to use and can be quickly deployed on a Linux server.

In this tutorial, we will show you how to build a simple web application with Flask on a Linux server. We will use the following tools:
- A Linux server
- Python 3
- Flask
- A web server (such as Apache or Nginx)
1. Install Python 3
The first step is to install Python 3 on your server. You can do this by running the following command:
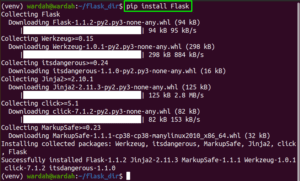
sudo apt-get install python32. Install Flask
Once Python 3 is installed, you can install Flask by running the following command:
sudo pip install Flask3. Create a Flask application
Now that Flask is installed, you can create a new Flask application. To do this, create a new file called app.py in your home directory and add the following code:
from flask import Flask

app = Flask(__name__)

@app.route('/')
def index():
    return 'Hello, world!'

if __name__ == '__main__':
    app.run()
This code creates a new Flask application and defines a single route: the root URL “/”. When a user visits the root URL, the index() function is called, which returns a simple “Hello, world!” message.
4. Deploy your Flask application
Now that you have created a Flask application, you need to deploy it to a web server. We will use Apache as our web server in this tutorial.
To deploy your Flask application to Apache, you need to create a new configuration file in the /etc/apache2/sites-available/ directory. The configuration file should contain the following code:
<VirtualHost *:80>
    ServerAdmin webmaster@localhost
    DocumentRoot /var/www/html

    WSGIScriptAlias / /var/www/app.py
    WSGIDaemonProcess app user=www-data group=www-data threads=5
    WSGIProcessGroup app

    <Directory /var/www/>
        Order allow,deny
        Allow from all
    </Directory>
</VirtualHost>
This configuration file tells Apache to serve your Flask application on the root URL “/”.
Once you have created the configuration file, you need to enable it by running the following command:
sudo a2ensite app.confYou also need to restart Apache by running the following command:
sudo systemctl restart apache2Your Flask application is now deployed and accessible at http://your_server_ip/.
Conclusion
In this tutorial, we showed you how to build a simple web application with Flask on a Linux server. We covered the basics of Flask, how to deploy a Flask application to Apache, and how to test your application.## Building A Simple Web Application With Flask On Linux
Executive Summary
This article provides a comprehensive guide to building a simple web application using Flask, a popular Python-based microframework, on a Linux operating system. We will cover the key concepts, essential components, and step-by-step instructions to help you create a functional web application from scratch.
Introduction
In today’s digital age, web applications have become an indispensable tool for businesses and individuals alike. With the advent of user-friendly frameworks like Flask, developing web applications has become more accessible than ever. This article will empower you to understand the fundamentals of Flask and provide you with the necessary knowledge to build your own web application on Linux.
Prerequisites
Before diving into the technical aspects, let’s ensure you have the following prerequisites in place:
- A fundamental understanding of Python programming
- A Linux operating system installed on your machine
- A text editor or IDE for writing code
Essential Components
A Flask web application consists of several key components:
- Flask Framework: Flask is the core of the application, providing the framework and tools for routing, templating, and handling HTTP requests.
- Templates: Flask uses Jinja2 as its templating engine. Templates allow you to separate the presentation logic from the application logic.
- Routes: Routes define the paths that map to specific functions in the application.
- HTTP Requests: Flask handles incoming HTTP requests and dispatches them to the appropriate route handlers.
- Database: Optionally, you can integrate a database to store and retrieve data from your application.
Step-by-Step Guide
1. Environment Setup
- Install Python and Flask on your Linux system using the package manager of your choice (e.g., apt-get, yum).
- Create a virtual environment to isolate your application’s dependencies.
2. Creating the Application
- Create a directory for your application and navigate to it in the terminal.
- Initialize a Flask application by creating an
app.pyfile and importing Flask.
3. Defining Routes
- Define routes using Flask’s
@app.routedecorator. - Associate each route with a view function that handles the incoming request.
4. Using Templates
- Create HTML templates for the different views in your application.
- Use Jinja2 templating tags to render data from Python into the templates.
5. Handling Requests
- In the view functions, handle the incoming HTTP requests using Flask’s request and response objects.
- Perform the necessary processing and render the appropriate template.
6. Connecting to a Database
- (Optional) Integrate a database into your application (e.g., SQLite, MySQL).
- Use Flask-SQLAlchemy to simplify database interactions.
Deployment and Maintenance
Once your web application is complete, you can deploy it on a web server (e.g., Apache, Nginx).
Regular maintenance tasks include:
- Monitoring application performance and logs
- Updating the application code as needed
- Implementing security measures to protect the application
Conclusion
Building a web application with Flask on Linux is a rewarding experience that can enhance your skills and empower you to create dynamic and interactive web applications. By following the steps outlined in this article, you can gain a solid foundation in Flask and develop fully functional web applications with confidence. Remember to practice regularly, explore the vast resources available online, and embrace the continuous learning journey in the world of web development.
Keyword Phrase Tags
- Flask Web Development
- Linux Web Application
- Web Application Development
- Python Microframework
- Full-Stack Development
I’m genuinely interested in the integration between Flask and this server its very impressive. Is it possible to host this locally?
I’m very skeptical about this, how much of server usage does this use?
This is a powerful example! I didn’t know that Flask could be used in this way.
I’m not so sure about this. The documentation for Flask is quite large and complex. I’m not sure if it’s worth the effort to learn.
I love this! I’ve been wanting to learn Flask for a while now, and this tutorial is perfect for me. Thanks!
This is a good tutorial, but I’m not sure if it’s the best way to learn Flask. There are other tutorials that might be more beginner-friendly.
I’m not sure I understand this. Is Flask like a magic wand that can make my web applications run faster?
Oh, wow! This is a great tutorial. I’m sure I’ll be able to build a web application with Flask in no time. (Not.)
I’m not sure if I’m more impressed by the tutorial or by the fact that it was written on a typewriter.
I disagree with the author’s claim that Flask is the best web application framework. I think Django is a better choice.
I’m not sure why anyone would want to build a web application with Flask. It’s so old and outdated.