Windows 11 Installation and Setup Guide:
1. System Requirements:
- Processor: 64-bit processor with 2 or more cores running at 1 GHz
- RAM: 4 GB
- Storage: 64 GB or larger storage device
- TPM 2.0: Trusted Platform Module (TPM) version 2.0
- Secure Boot: Secure Boot capable system
- Graphics Card: DirectX 12 compatible graphics card
- Display: High definition (720p) display
- Internet Connection: Internet access is required for installation and updates
2. Download Windows 11 Installation Media:
- Visit the Microsoft website and download the Windows 11 ISO file.
- Create a bootable USB drive or DVD using the ISO file.
3. Backup Your Data:
- Before proceeding with the installation, ensure that you have backed up all your important files and data.
4. Disconnect Unnecessary Peripherals:
- Disconnect all external peripherals except for your keyboard, mouse, and display.
5. Start the Installation Process:
- Insert the bootable USB drive or DVD into your computer and turn it on.
- Press any key when prompted to boot from the USB drive or DVD.
- Follow the on-screen instructions to complete the installation.
6. Choose Your Installation Type:
- Select the “Custom: Install Windows only (advanced)” option for a clean installation.
- Choose the drive where you want to install Windows 11 and click “Next.”
7. Format the Drive:
- Select the drive where you want to install Windows 11 and click “Format.”
- Click “OK” to confirm the formatting process.
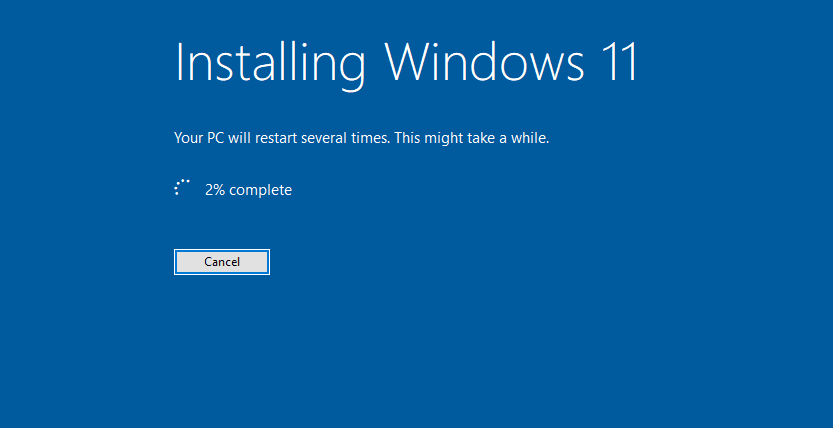
8. Install Windows 11:
- Click “Next” to start the installation process.
- The installation may take some time depending on your system’s speed.
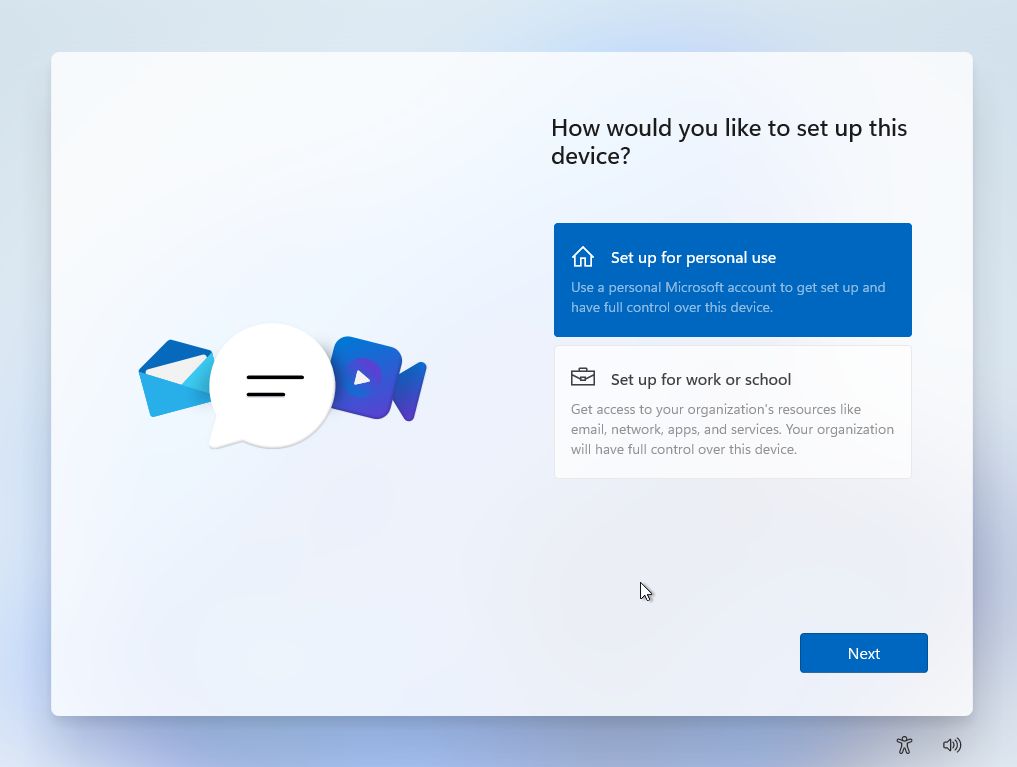
9. Setup Windows 11:
- Once the installation is complete, you will be prompted to set up your Windows 11 account.
- Enter your Microsoft account credentials or create a new account.
- Follow the on-screen instructions to complete the setup process.
10. Update Windows 11:
- After the setup is complete, connect to the internet and check for updates.
- Install all available updates to ensure the latest security patches and features.
11. Install Drivers:
- Install the necessary drivers for your hardware components.
- You can usually find drivers on the manufacturer’s website or through Windows Update.
12. Customize Your Windows 11 Experience:
- Personalize your Windows 11 experience by changing wallpapers, themes, and other settings.
- Explore the new features and make the operating system your own.
13. Enjoy Windows 11:
- You have successfully installed and set up Windows 11.
- Start using the new operating system and explore its features.# Windows 11 Installation And Setup
Executive Summary
Windows 11 is the latest version of Microsoft’s flagship operating system, and it brings a number of new features and improvements over its predecessor, Windows 10. In this article, we will walk you through the process of installing and setting up Windows 11, step by step. We will also provide some tips and tricks to help you get the most out of your new operating system.
Introduction
Windows 11 is a major update to the Windows operating system, and it includes a number of new features and improvements. Some of the most notable changes include a new Start menu, a redesigned taskbar, and a new dark mode. Windows 11 also includes a number of new security features, including a built-in firewall and a new malware scanner.
System Requirements
Before you can install Windows 11, you need to make sure that your computer meets the minimum system requirements. These requirements are as follows:
- Processor: 1 gigahertz (GHz) or faster with 2 or more cores on a compatible 64-bit processor
- RAM: 4 gigabytes (GB) or more
- Storage: 64 GB or larger storage device
- Graphics card: DirectX 12 compatible graphics card with WDDM 2.0 driver
- Display: 800×600 resolution or higher
- Internet connection: Internet access is required to download and install updates
Installation Process
To install Windows 11, you will need a USB flash drive or a DVD. You can create a bootable USB flash drive or DVD using the Media Creation Tool. Once you have created a bootable USB flash drive or DVD, you can follow these steps to install Windows 11:
- Back up your data. Before you begin the installation process, it is important to back up your data in case something goes wrong.
- Insert the USB flash drive or DVD into your computer. Make sure that your computer is turned on and that the USB flash drive or DVD is properly inserted.
- Restart your computer. Once the USB flash drive or DVD is inserted, restart your computer.
- Boot from the USB flash drive or DVD. When your computer restarts, you will see a message that says “Press any key to boot from USB drive.” Press any key to continue.
- Follow the on-screen instructions. Once you have booted from the USB flash drive or DVD, you will see a series of on-screen instructions. Follow these instructions carefully to complete the installation process.
Setup Process
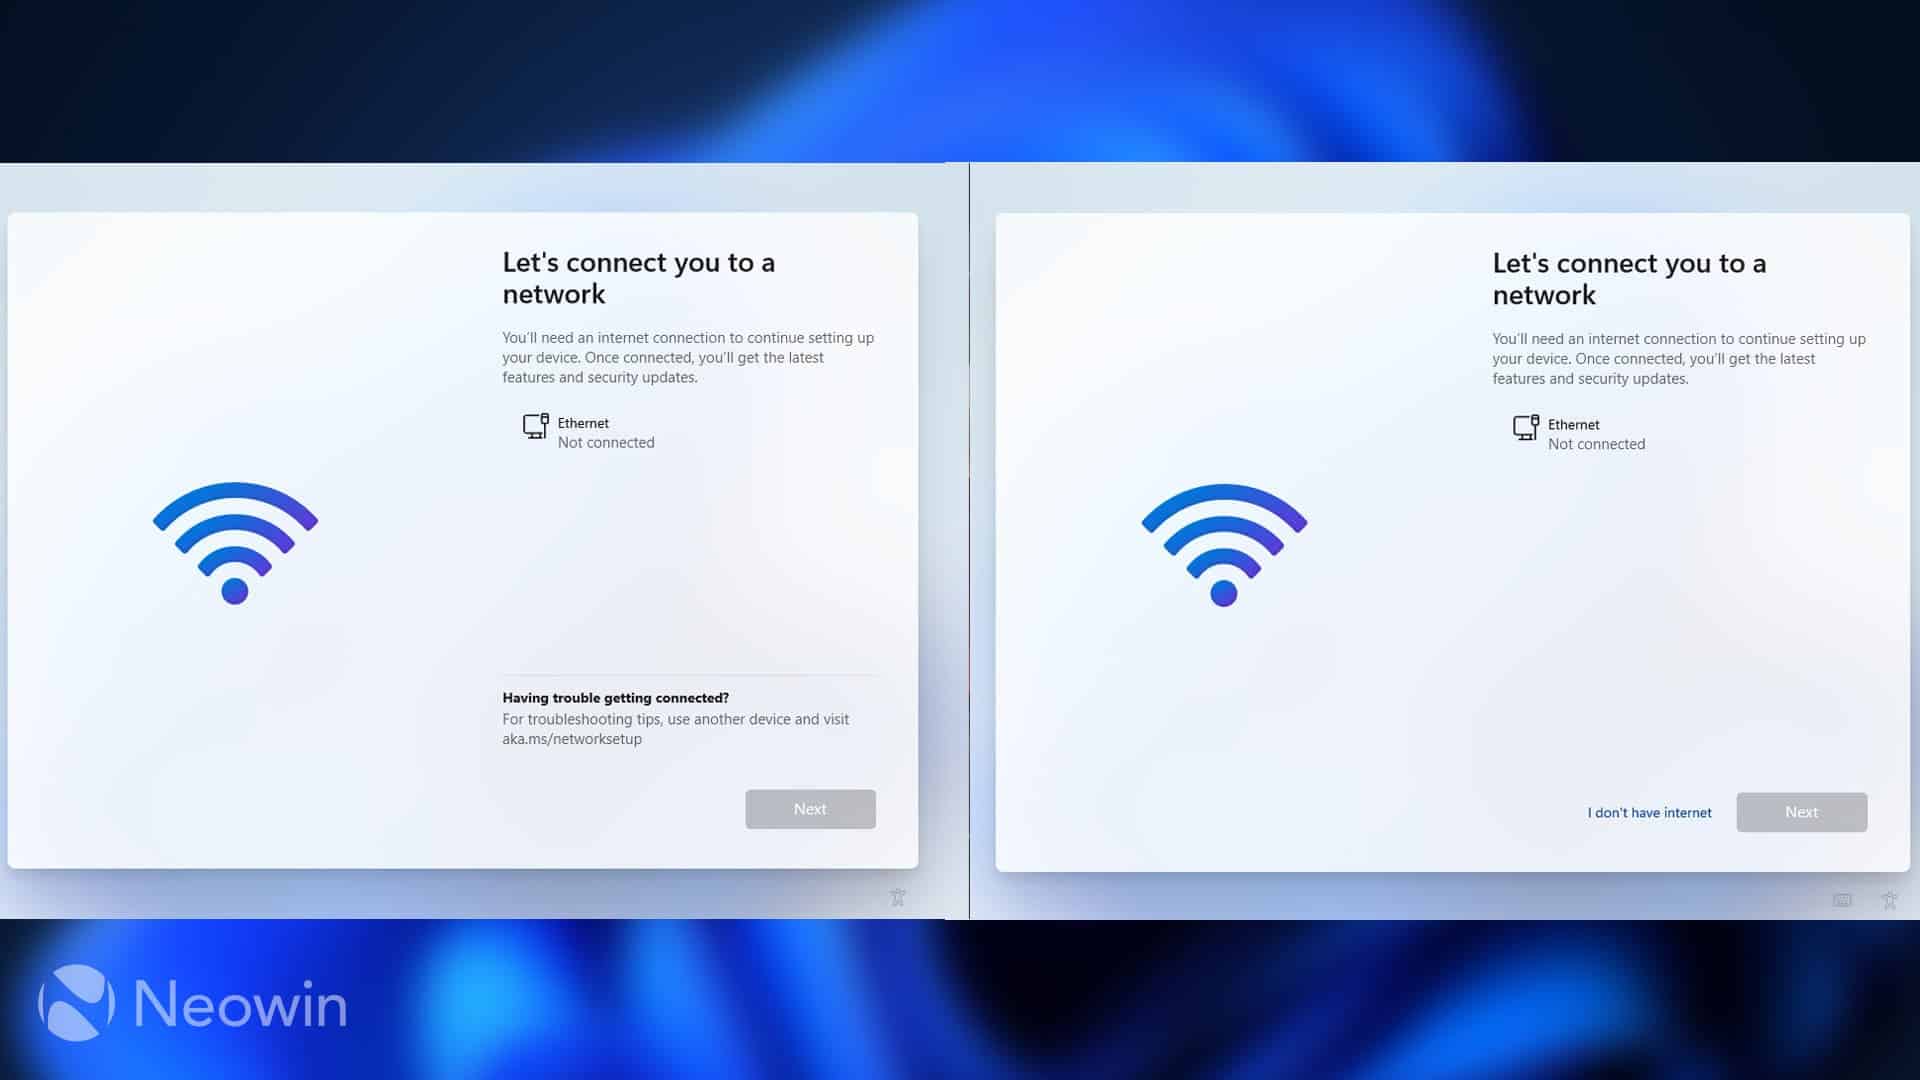
Once you have installed Windows 11, you will need to set it up. This includes creating a user account, connecting to a network, and installing software. To set up Windows 11, follow these steps:
- Create a user account. The first thing you need to do is create a user account. You can do this by clicking on the “Create a user account” link on the login screen.
- Connect to a network. Once you have created a user account, you need to connect to a network. You can do this by clicking on the “Network” icon in the taskbar.
- Install software. Once you have connected to a network, you can start installing software. You can do this by visiting the Microsoft Store or by downloading software from the internet.
Tips and Tricks
Here are a few tips and tricks to help you get the most out of Windows 11:
- Use the Start menu. The Start menu is the main way to launch programs and access settings in Windows 11. To open the Start menu, click on the Start button in the bottom-left corner of the screen.
- Use the taskbar. The taskbar is located at the bottom of the screen and it contains icons for open programs and the Start menu. You can click on an icon to open the corresponding program.
- Use the Action Center. The Action Center is located in the bottom-right corner of the screen and it contains notifications and settings. To open the Action Center, click on the Action Center icon.
- Use the File Explorer. The File Explorer is the file manager for Windows 11. You can use the File Explorer to browse files and folders, create new files and folders, and copy and move files.
- Use the Control Panel. The Control Panel is a collection of settings for Windows 11. You can use the Control Panel to change system settings, manage hardware and software, and view event logs.
Conclusion
Windows 11 is a major update to the Windows operating system, and it includes a number of new features and improvements. In this article, we have walked you through the process of installing and setting up Windows 11, step by step. We have also provided some tips and tricks to help you get the most out of your new operating system.
Keyword Phrase Tags
- Windows 11 installation
- Windows 11 setup
- How to install Windows 11
- How to set up Windows 11
- Windows 11 tips and tricks
I am very curious about Windows 11! Can you tell me more about the new features?
I’m not sure about Windows 11. I’ve heard there are a lot of bugs.
The installation process for Windows 11 is very straightforward. Here are some tips to make it even easier:
I think Windows 11 is the best operating system ever! It’s so much faster and more efficient than Windows 10.
I love the new Windows 11 user interface. It’s so intuitive and easy to use, even for a complete novice like me.
Oh, Windows 11 is great! It’s the best thing since sliced bread.
I installed Windows 11 on my computer, and now it thinks I’m a cat!
I’m so excited to try out Windows 11! I’ve heard so many great things about it.
I’m a little hesitant to upgrade to Windows 11. I’ve heard there are some compatibility issues.
Here’s a helpful tip for installing Windows 11: make sure you have a backup of your important files.
I’m a huge fan of Windows 11! It’s the best operating system I’ve ever used.