The Ultimate Guide To Minecraft Potions And Brewing
Brewing in Minecraft is a versatile and rewarding system that allows players to create potions with a variety of unique and powerful effects. Whether you’re looking to create healing potions for your adventures or utility potions to aid in farming or exploration, brewing is a valuable skill to master.
Getting Started with Brewing
To get started with brewing, you will need:
- A Brewing Stand – Crafted using 1 Blaze Rod and 3 Cobblestone
- A Water Bottle – Crafted using 3 Glass Blocks
- Blaze Powder – Obtained by killing Blazes.
- Ingredients – Found in the Overworld or Nether, such as Nether Wart, Ghast Tears, or Spider Eyes.
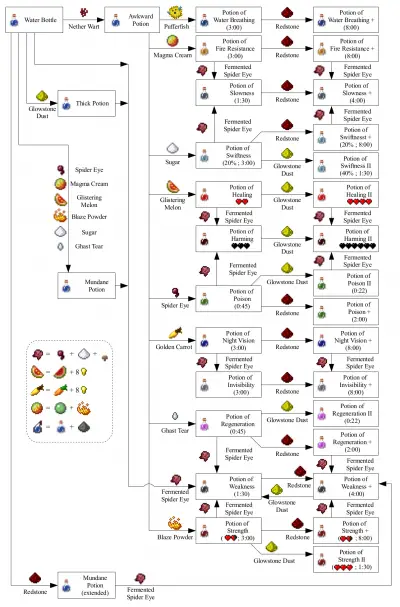
The Brewing Process
To brew a potion, place a water bottle in the bottom slot of the brewing stand. Add the desired ingredients to the top slot, then add Blaze Powder to the center slot. The potion will begin brewing, and once it is complete, you can bottle it by placing an empty glass bottle in the bottom slot.
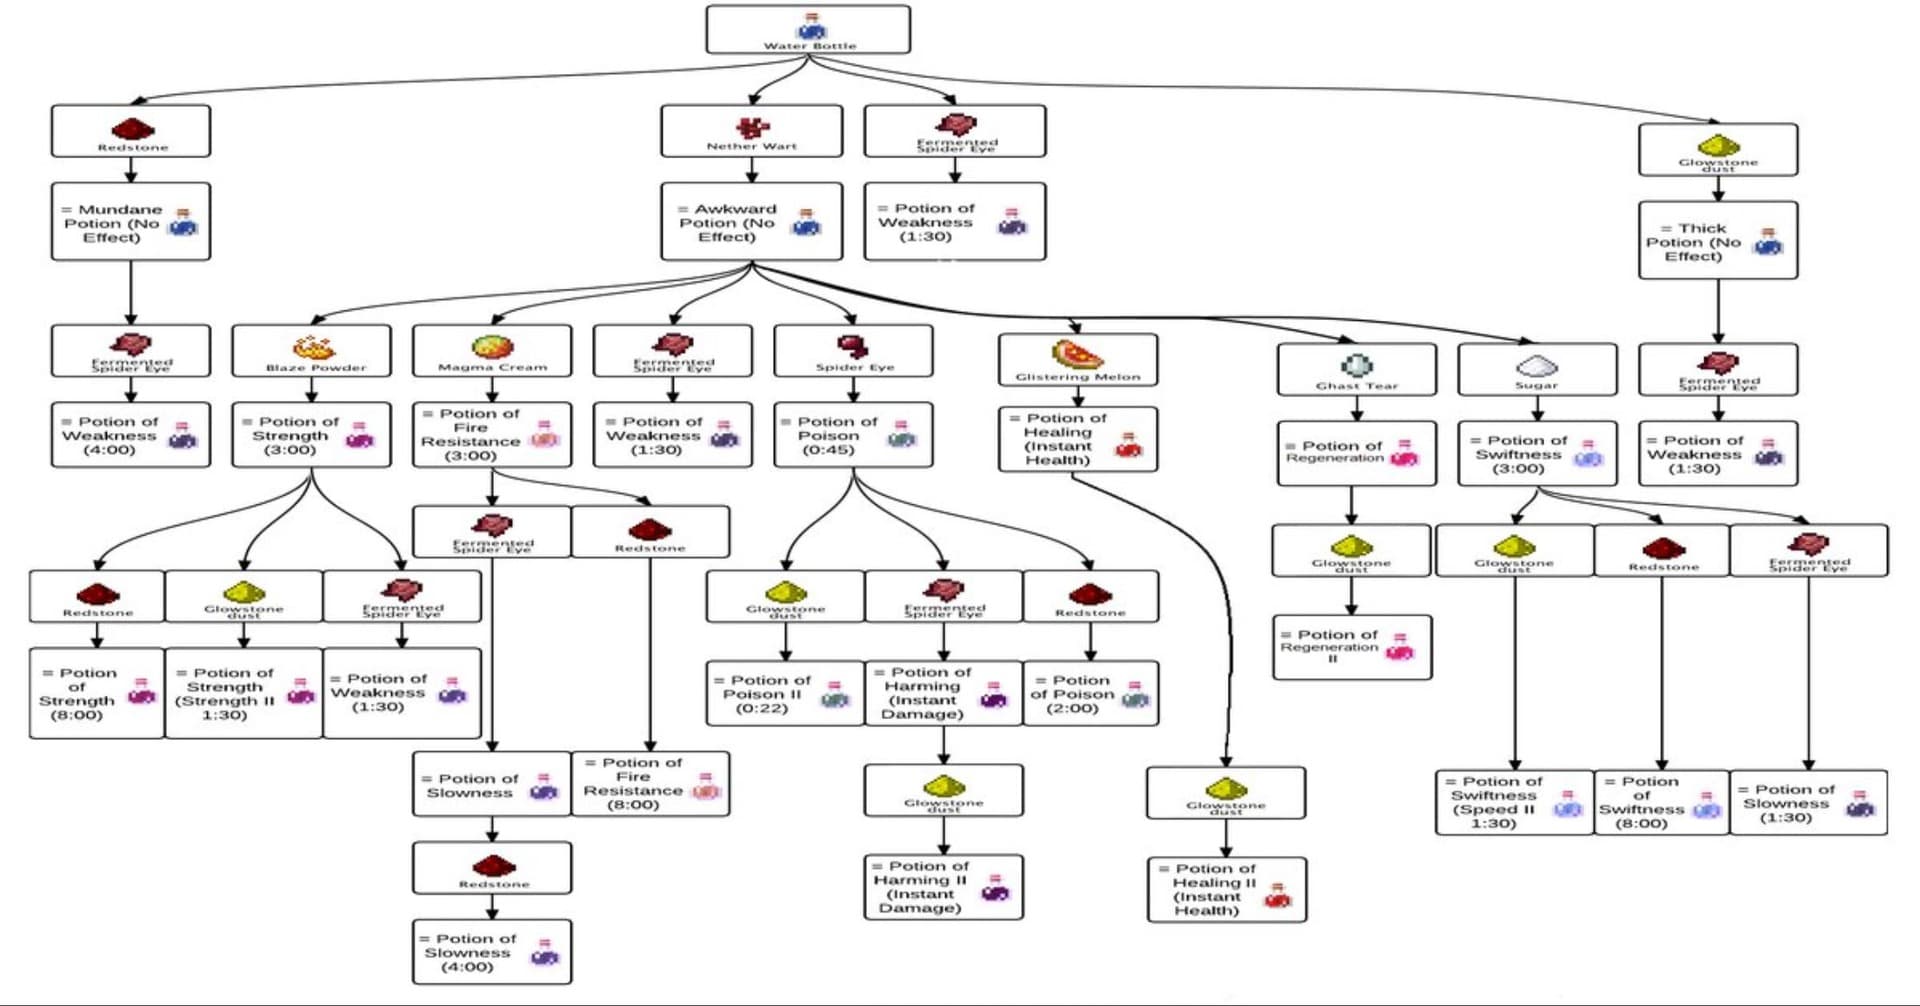
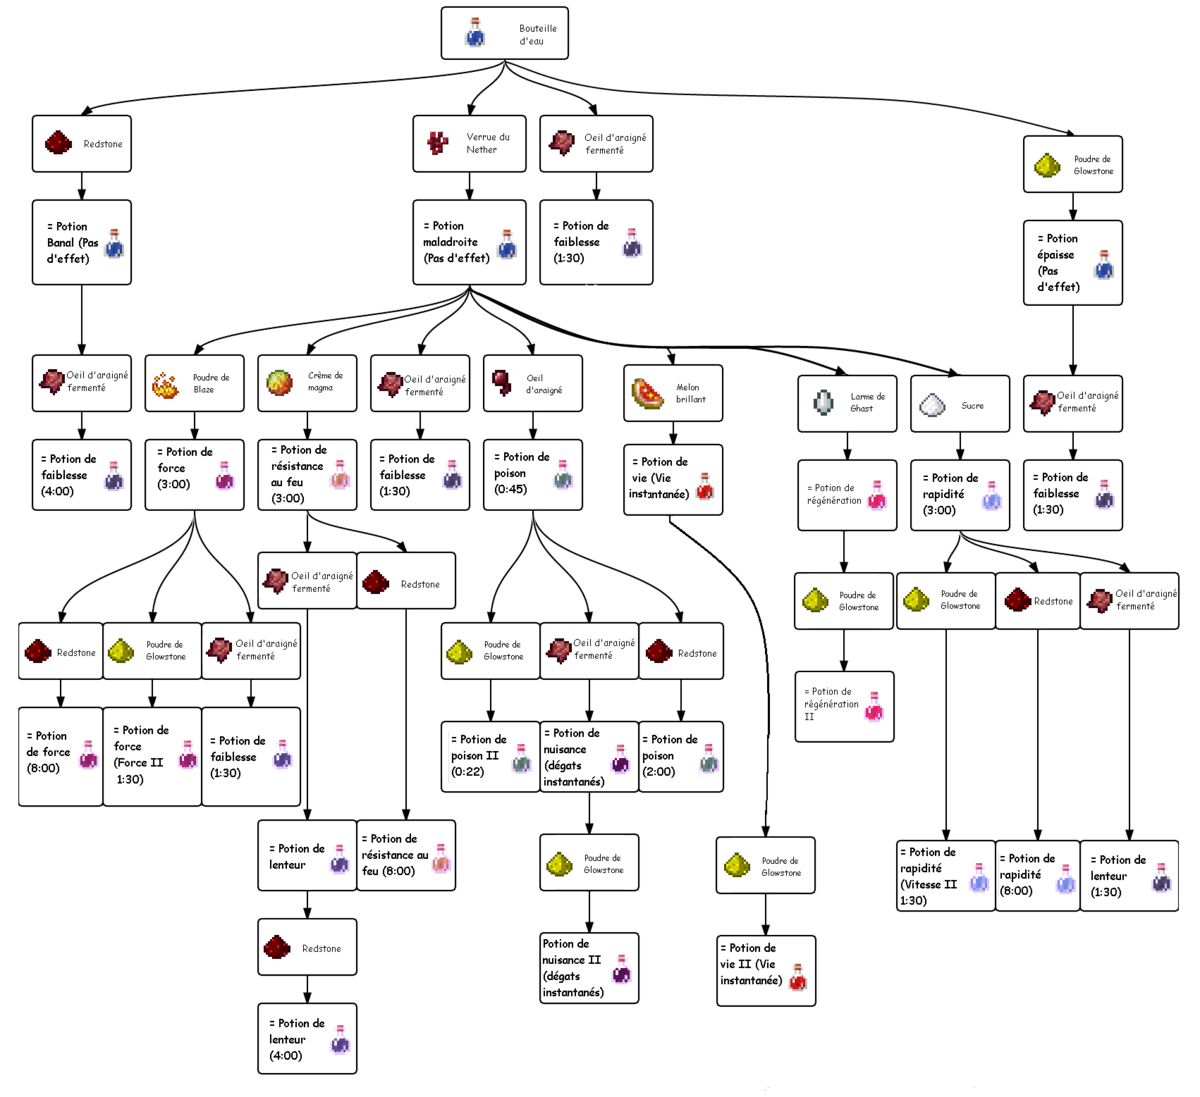
Types of Potions
There are many different types of potions available in Minecraft, each with its own unique effects. Some of the most popular potions include:
- Health Potion – Heals the player over time.
- Regeneration Potion – Regenerates the player’s health quickly.
- Fire Resistance Potion – Protects the player from fire damage.
- Strength Potion – Increases the player’s strength, causing them to deal more damage.
- Speed Potion – Increases the player’s speed, allowing them to move faster.
- Night Vision Potion – Allows the player to see in the dark.
Combining Potions
Potions can be combined to create more powerful and versatile effects. For example, combining a Health Potion with a Regeneration Potion will create a potion that heals the player over time and regenerates their health quickly.
Experimenting with Brewing
The possibilities for brewing are endless, and players are encouraged to experiment with different ingredients and combinations to create their own unique potions. With a little bit of creativity and experimentation, you can create potions that will help you survive, explore, and thrive in the world of Minecraft.
Additional Tips
Here are some additional tips for brewing potions in Minecraft:
- Stackable Effects: If you drink multiple potions with the same effect, the effects will stack up to a maximum of II.
- Lingering Potions: Splash Potions can be turned into Lingering Potions by adding Dragon’s Breath to the brewing stand. Lingering Potions create a cloud of particles that can provide effects to anyone who walks through them.
- Extended Potions: Potions can be extended by adding Redstone Dust to the brewing stand. Extended Potions last for 8 minutes instead of the usual 3 minutes.
- Tipped Arrows: Potions can be used to create Tipped Arrows by dipping arrows into them. Tipped Arrows will inflict the potion’s effects on their targets.
OMG this is awesome!
Very well written, thank you for sharing!
I’ve never seen a guide to Minecraft Potions and Brewing this comprehensive before!
I’m not really into Minecraft, but this guide is so well-written that I actually enjoyed reading it!
This guide is too long and complicated.
I disagree with your choice of ingredients for the potion of strength.
This guide is so good, it’s almost like cheating!
Wow, thanks for this amazing guide to Minecraft Potions and Brewing. I can’t wait to use it to make my potions even more powerful!
I’m not sure if I’m more impressed by the guide or the fact that you named it ‘The Ultimate Guide To Minecraft Potions And Brewing’.
This guide is terrible! It’s full of errors!
I found this guide very helpful. Thanks for sharing!