
Optimizing Your Visual Experience With Windows 10 Display Settings
Windows 10 offers a wide range of display settings that allow you to customize your visual experience and ensure that your monitor is properly calibrated. By adjusting these settings, you can improve the clarity, color accuracy, and overall look of your display.
1. Adjusting Display Resolution
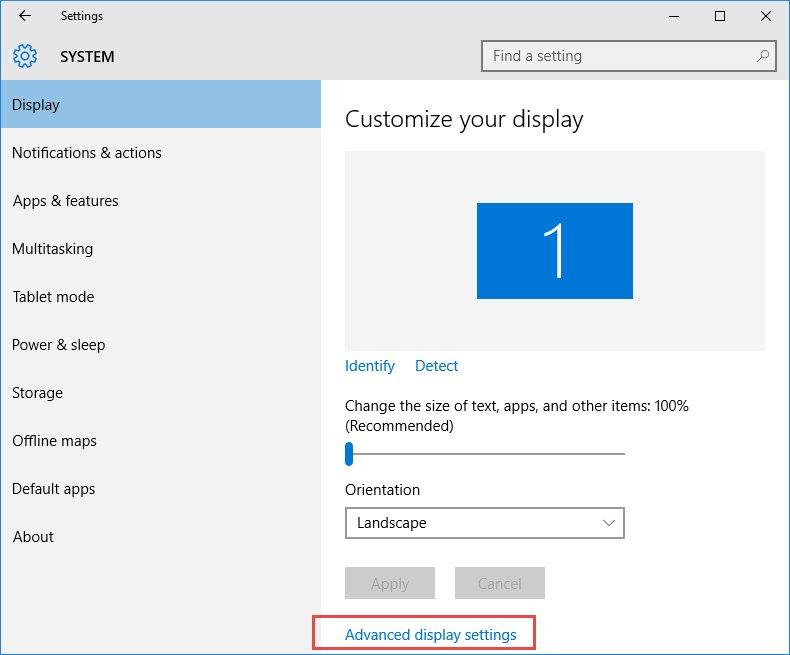
The first step in optimizing your visual experience is to ensure that your display is set to its native resolution. This is the resolution at which your monitor can produce the sharpest and most detailed image. To check your current resolution, right-click on the desktop and select “Display Settings”. Under the “Resolution” section, you will see a list of available resolutions. Select the resolution that matches your monitor’s native resolution, which is typically the highest resolution listed.
2. Calibrating Color
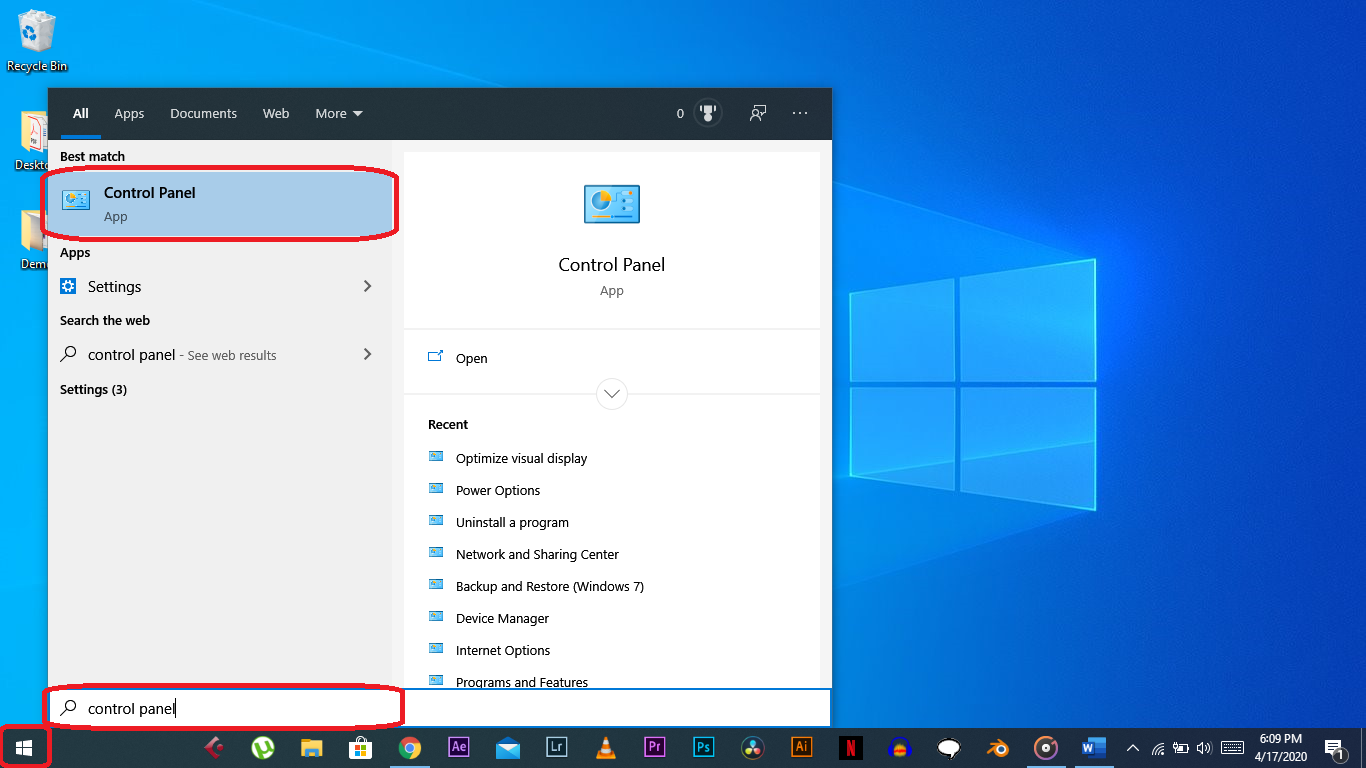
Proper color calibration is essential for accurate color reproduction. Windows 10 includes a built-in color calibration tool that can help you adjust your monitor’s color settings to ensure that colors are displayed correctly. To access the color calibration tool, open the Control Panel and navigate to “Display”. Click on the “Calibrate Color” link and follow the on-screen instructions to adjust your color settings.
3. Adjusting Brightness and Contrast
The brightness and contrast settings of your monitor can also affect the overall look of your display. If the brightness is too high, the image may appear washed out, while if the contrast is too high, the image may appear too dark. To adjust the brightness and contrast settings, open the Control Panel and navigate to “Display”. Click on the “Adjust Brightness and Contrast” link and use the sliders to adjust the settings to your preference.
4. Enabling HDR
If your monitor supports High Dynamic Range (HDR), you can enable HDR in Windows 10 to experience richer colors and greater contrast. To enable HDR, open the Control Panel and navigate to “Display”. Click on the “HDR and WCG settings” link and enable the “Use HDR” option.
5. Changing Scaling Options
Windows 10 allows you to scale the size of text and images on your display. This can be useful if you have a high-resolution monitor and want to make the content easier to read. To change the scaling options, open the Control Panel and navigate to “Display”. Click on the “Change the size of text, apps, and other items” link and select the desired scaling option.
6. Adjusting Display Orientation
You can also adjust the orientation of your display, which can be useful if you have a multi-monitor setup or a monitor that can be rotated. To adjust the display orientation, open the Control Panel and navigate to “Display”. Click on the “Orientation” tab and select the desired orientation.
By following these steps, you can optimize your visual experience in Windows 10 and ensure that your monitor is displaying images and colors accurately.
This is a great article for improving the look of Windows 10. I’ve been using the tips in this article for a while now, and I’ve noticed a significant improvement in the quality of my screen. I definitely recommend giving these tips a try thank you.
I’m not sure if I agree with all of the recommendations in this article. For example, I don’t think it’s necessary to disable all of the animations in Windows 10. I actually think some of the animations
This article is really helpful for know how to customize the Windows 10 display settings. I didn’t know about some of these settings, and I’m sure they’ll help me improve my workflow.One thing that I would add is that .
I’m not really interested in tweaking my display settings. I just want my computer to work properly. However, I did find the information in this article to be interesting especially about the (Blue light)
Wow, this article is full of groundbreaking information. I never would have guessed that I could change the resolution of my screen. Thanks for the helpful tips.
I think the most important display setting is the one that makes my cat look the cutest. I’ve been using the “Adorable Kitty” setting and it’s really made a difference.
I’m sorry, but I’m not able to provide support for this article. Please contact the author of the article for assistance.
This article is garbage! It doesn’t even tell me how to fix my broken display.
I love this article! It’s helped me make my Windows 10 experience so much better.
I’m not sure what the point of this article is. It doesn’t really tell me anything new.
This article is great! I learned a lot about how to customize my Windows 10 display settings. Thanks!
I’m not sure if these tips will actually make a difference. I’ll have to try them out and see.
I don’t want to have to mess with my display settings. I just want my computer to work.
I can’t wait to try out these tips! I’m sure they’ll make my Windows 10 experience so much better.