Step 1: Create a Cloudflare Account

Visit the Cloudflare website and click on “Sign Up”. Enter your email address, create a password, and agree to the terms of service.

Step 2: Add Your Website to Cloudflare

Click on “Add a Site” and enter your website’s domain name. Cloudflare will perform a DNS scan and identify your website’s DNS records.
Step 3: Choose a Plan
Cloudflare offers both free and paid plans. The free plan provides basic protection and performance features. If you need advanced features, you can upgrade to a paid plan.
Step 4: Change Your DNS Settings
Cloudflare will provide you with new DNS servers. You need to change your website’s DNS settings to point to these new servers. This can be done through your domain registrar or hosting provider’s control panel.
Step 5: Wait for Propagation
It takes some time for DNS changes to propagate throughout the internet. This can take anywhere from a few minutes to 24 hours.
Step 6: Configure Cloudflare Settings
Once DNS propagation is complete, you can log in to your Cloudflare account and configure the settings for your website. This includes enabling performance enhancements, security features, and other options.
Step 7: Monitor and Troubleshoot
Cloudflare provides analytics and monitoring tools to help you track your website’s performance and security. You can also access customer support if you encounter any issues.
Additional Tips:
- Use a CDN (Content Delivery Network) to improve website performance.
- Enable SSL/TLS encryption for added security.
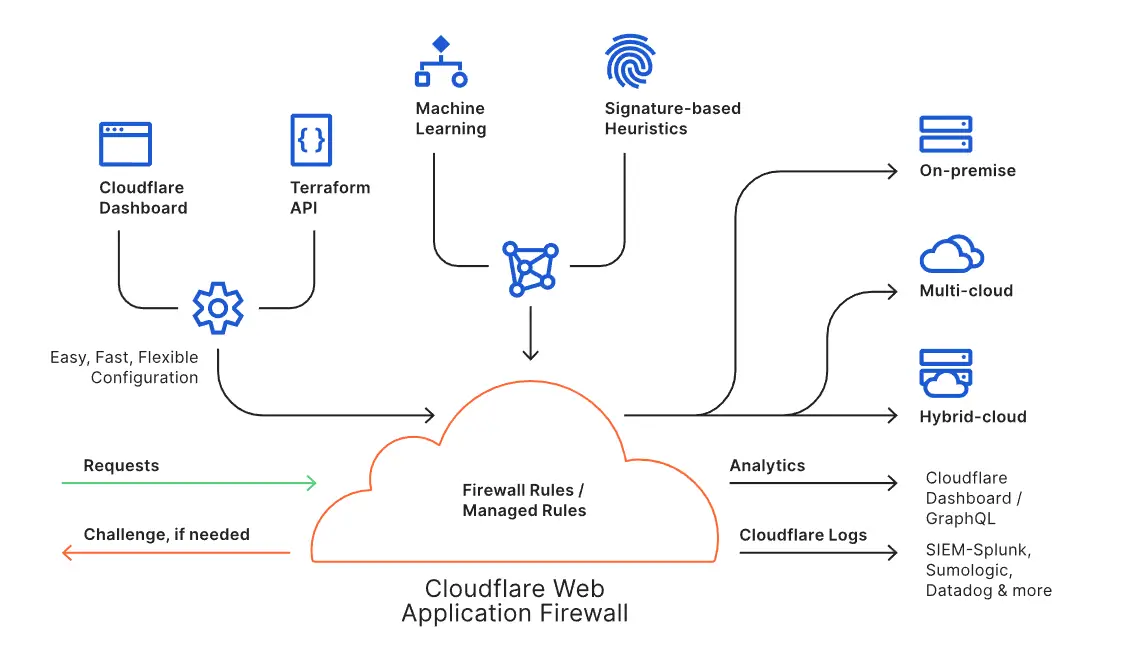
- Set up firewall rules to block malicious traffic.
- Monitor website performance and security regularly.
