Getting Started With Windows 10’s Linux Subsystem
1. Enable the Windows Subsystem for Linux
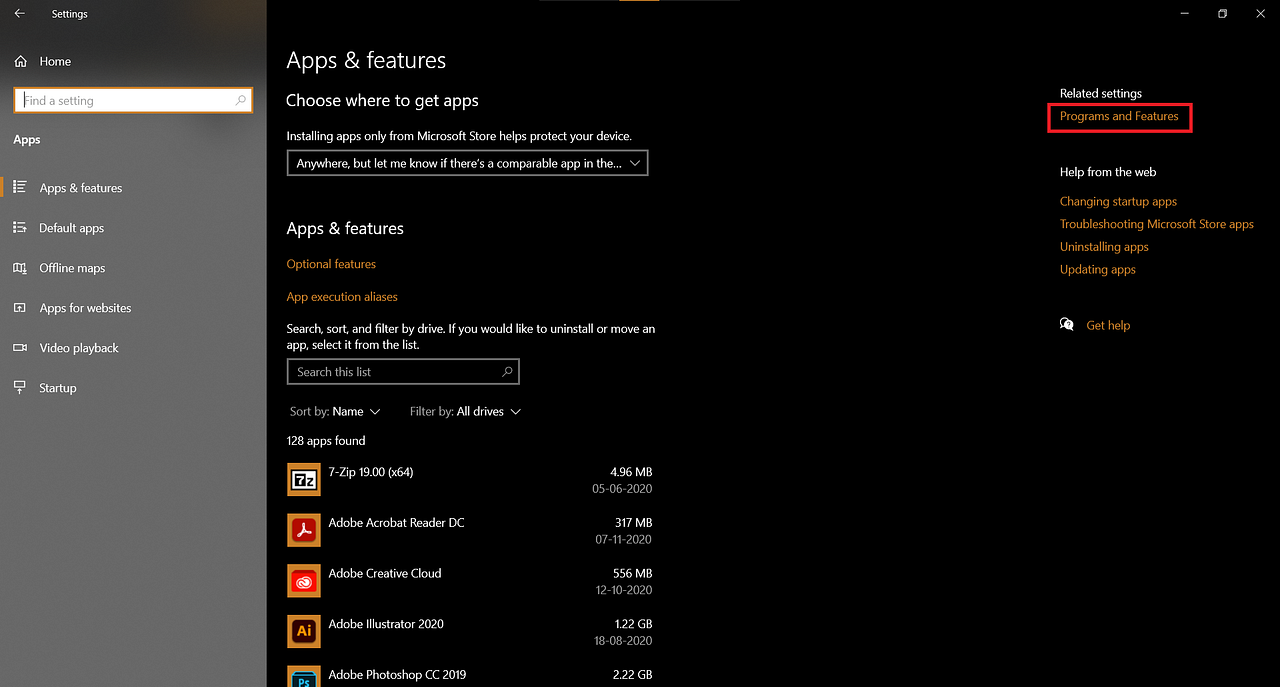
- Open Settings > Apps > Programs & features.
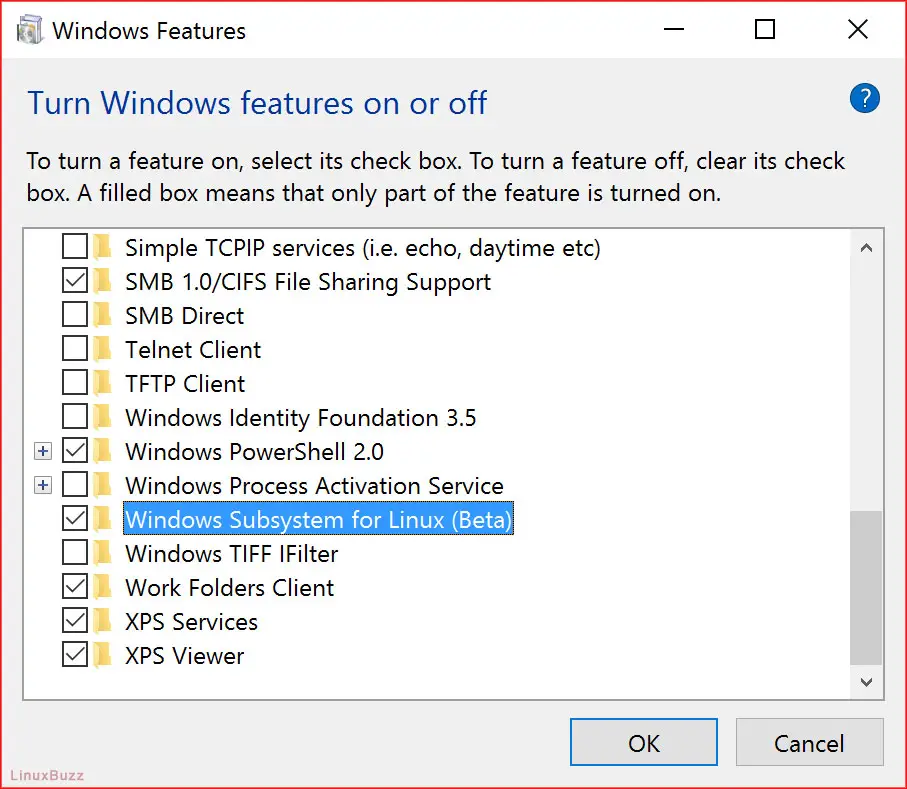
- Click ‘Turn Windows features on or off’.
- Check the box for ‘Windows Subsystem for Linux’.
- Click OK and restart your computer.
2. Install a Linux distribution
- Open the Microsoft Store and search for “Linux”.
- Select the Linux distribution you want to install (e.g., Ubuntu, Fedora, SUSE).
- Click ‘Get’ and then ‘Launch’ once the installation is complete.
3. Create a user account
- When you launch your Linux distribution for the first time, you’ll be prompted to create a user account.
- Enter a username, password, and real name.
4. Update and upgrade your system
- Open a terminal window in your Linux distribution.
- Run the following commands to update and upgrade your system:
sudo apt-get update
sudo apt-get upgrade
5. Use Linux command-line tools
Once you’ve installed a Linux distribution, you can use all the standard Linux command-line tools, such as:
ls: List files and directoriescd: Change directorymkdir: Create a directoryrm: Remove a file or directorytouch: Create a new fileecho: Print text to the console
6. Install additional software
You can install additional software in your Linux distribution using the package manager for your distribution. For example, to install Python in Ubuntu, you would run the following command:
sudo apt-get install python37. Run GUI applications
Some Linux GUI applications can be run on Windows 10 using the X server that is included with the Windows Subsystem for Linux. To run a GUI application, you can use the following command:
DISPLAY=:0 /path/to/applicationTips
-
You can use the
wslcommand to manage your Linux subsystems. For example, to list all installed Linux distributions, you can run the following command:wsl -l -
You can use the
wslconfigcommand to configure your Linux subsystems. For example, to set the default Linux distribution, you can run the following command:wslconfig /setdefault Ubuntu -
You can use the
lxruncommand to launch Linux applications. For example, to launch the Ubuntu terminal, you can run the following command:lxrun /launch ubuntu ```# Getting Started With Windows 10’s Linux Subsystem
Executive Summary
Windows 10’s Linux Subsystem (WSL) is a tool that has gained popularity among developers, allowing them to run Linux-based environments within Windows.
Introduction
With WSL, you can launch a Linux distribution of your choice, install Linux software, and run command-line tools and applications directly from within Windows.
This article will guide you through the process of setting up and using WSL, introducing you to the key features and benefits, and providing some practical use cases where WSL can be beneficial.
Understanding WSL Architecture
WSL consists of two main components:
- WSL Kernel: A lightweight virtualization layer that allows Linux to run on Windows without the need for a full-blown virtual machine.
- WSLg: A graphical user interface (GUI) component that allows you to run Linux applications with a graphical interface within Windows.
Installing and Setting Up WSL
To install WSL, you must enable the Windows Subsystem for Linux feature in Windows Features. You can do this by following these steps:
- Open the Settings app on Windows.
- Click on Apps.
- Click on Programs and Features.
- Click on Turn Windows features on or off.
- Check the box next to Windows Subsystem for Linux.
- Click on OK.
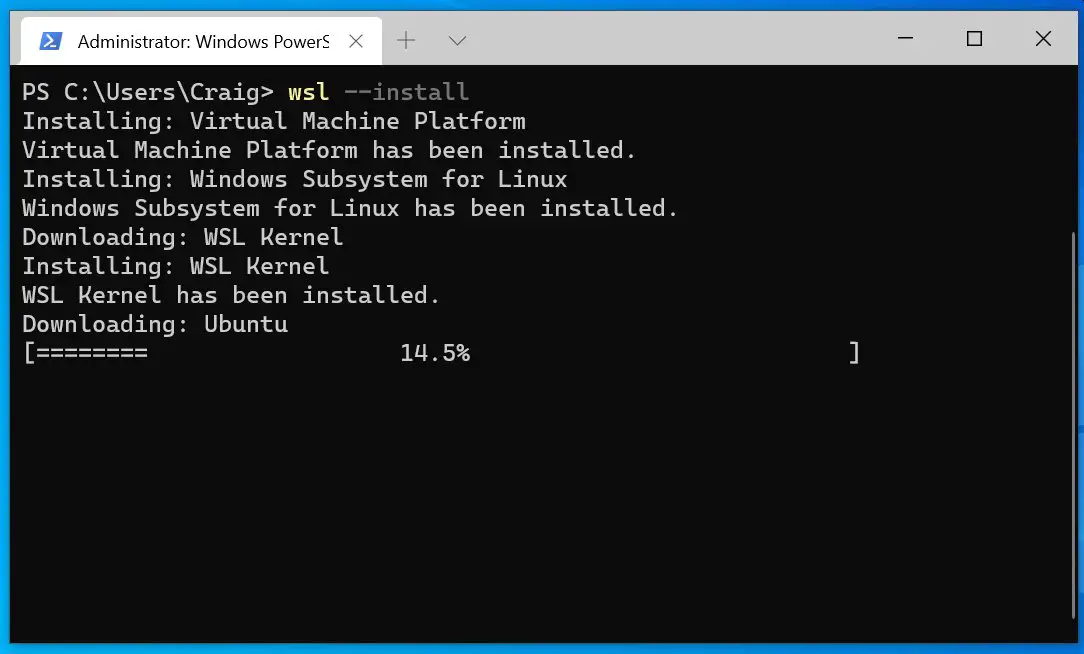
Once WSL is installed, you can download and install a Linux distribution of your choice from the Microsoft Store.
Benefits of Using WSL
WSL offers several benefits to developers and system administrators:
- Cross-Platform Compatibility: With WSL, you can run Linux applications and tools on Windows, allowing you to develop and test software for multiple platforms using a single machine.
- Improved Performance: WSL leverages Windows’s virtualization capabilities to provide better performance compared to traditional virtual machines.
- Simplified Development Environment: WSL integrates well with Windows tools and applications, providing a cohesive development environment for both Linux and Windows applications.
- Enhanced Security: WSL can enhance the security of your system by isolating Linux applications from the Windows operating system, reducing the risk of malware or security breaches.
Practical Use Cases for WSL
WSL can be used in various scenarios, including:
- Web Development: WSL allows you to set up a Linux-based development environment with tools like Apache, MySQL, and PHP, making it ideal for web development.
- Data Science and Machine Learning: With WSL, you can access powerful Linux tools for data analysis and machine learning, such as Python, Jupyter Notebooks, and TensorFlow.
- Software Development: WSL provides a platform to develop and test software for Linux and Windows, allowing developers to work on projects for either platform.
- System Administration: System administrators can use WSL to manage Linux servers remotely, perform system monitoring, and troubleshoot issues, all from within Windows.
Conclusion
Windows 10’s Linux Subsystem (WSL) offers developers and system administrators a powerful tool for running Linux-based environments on Windows. The combination of cross-platform compatibility and improved performance makes WSL an attractive option for various use cases. Whether you’re a web developer, a data scientist, a software developer, or a system administrator, WSL can enhance your productivity and streamline your workflows.
With its ease of use and extensive community support, WSL has become an essential tool for anyone who wants to work with Linux within a Windows environment.
Keyword Phrase Tags
- Windows 10
- Linux Subsystem
- WSL
- Cross-platform compatibility
- Development environment
WOW nice article!! amazing content man, thanks for sharing
This is bad, such disapointment, I expect much better from you
Actually, it is not recommended to create multiple local user accounts in Windows 10 in a production environment.
You are wrong, Windows Sandbox is an isolated desktop environment that runs inside the Windows Hypervisor, so it is very secure. Only the Windows Sandbox process can access the underlying hardware and software resources.
ironic hmmm, so the Subsystem is Linux but runs on Windows, how ironic
sarcastic ohhh so amazing, now we can run Linux in Windows without a virtual machine, such useful feature
nice article dude, thanks for sharing, I was looking for this, and I like how u explain in detail about the risks of using this subsystem
You should mention that you need to enable the Windows Subsystem for Linux optional feature in Windows Features before you can install a Linux distribution.
I’m not sure I understand the point of this. Why would I want to run Linux on Windows? If I want to run Linux, I would just install Linux by itself