Creating Your Own Minecraft Server: A Step-by-Step Guide
Minecraft is a popular sandbox video game that allows players to build their own worlds and create their own adventures. You can play Minecraft on your own or with friends, and one of the best ways to do this is to create your own Minecraft server. This will give you and your friends a place to play together and have your own unique world.
What You Need
Before you can create a Minecraft server, you will need a few things:
- A computer that is powerful enough to run a Minecraft server.
- A Minecraft server software.
- An internet connection.
Step 1: Choose a Minecraft Server Software
There are a few different Minecraft server software available, but the most popular is Bukkit. Bukkit is a free and open-source server software that allows you to customize your server with plugins and mods.
Step 2: Download the Minecraft Server Software
Once you have chosen a Minecraft server software, you need to download it. You can download Bukkit from the Bukkit website.
Step 3: Install the Minecraft Server Software
Once you have downloaded the Minecraft server software, you need to install it. The installation process will vary depending on the server software you are using.
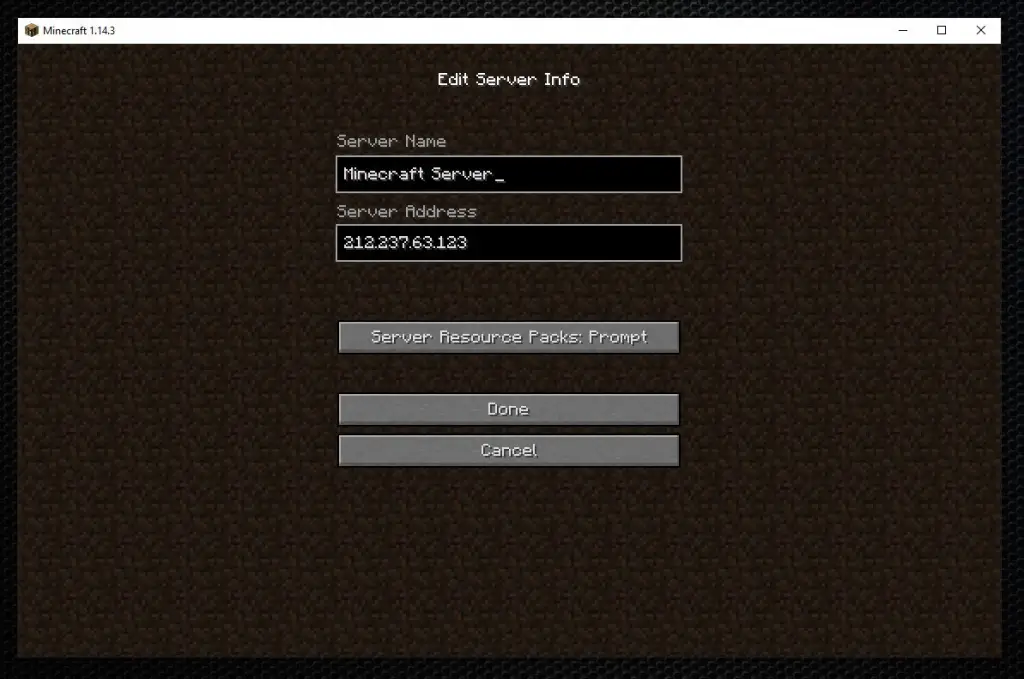
Step 4: Configure the Minecraft Server Software
Once the Minecraft server software is installed, you need to configure it. This includes setting the server name, the IP address, the port, and the game mode.
Step 5: Start the Minecraft Server
Once the Minecraft server software is configured, you can start it. The server will start running and you will be able to connect to it.
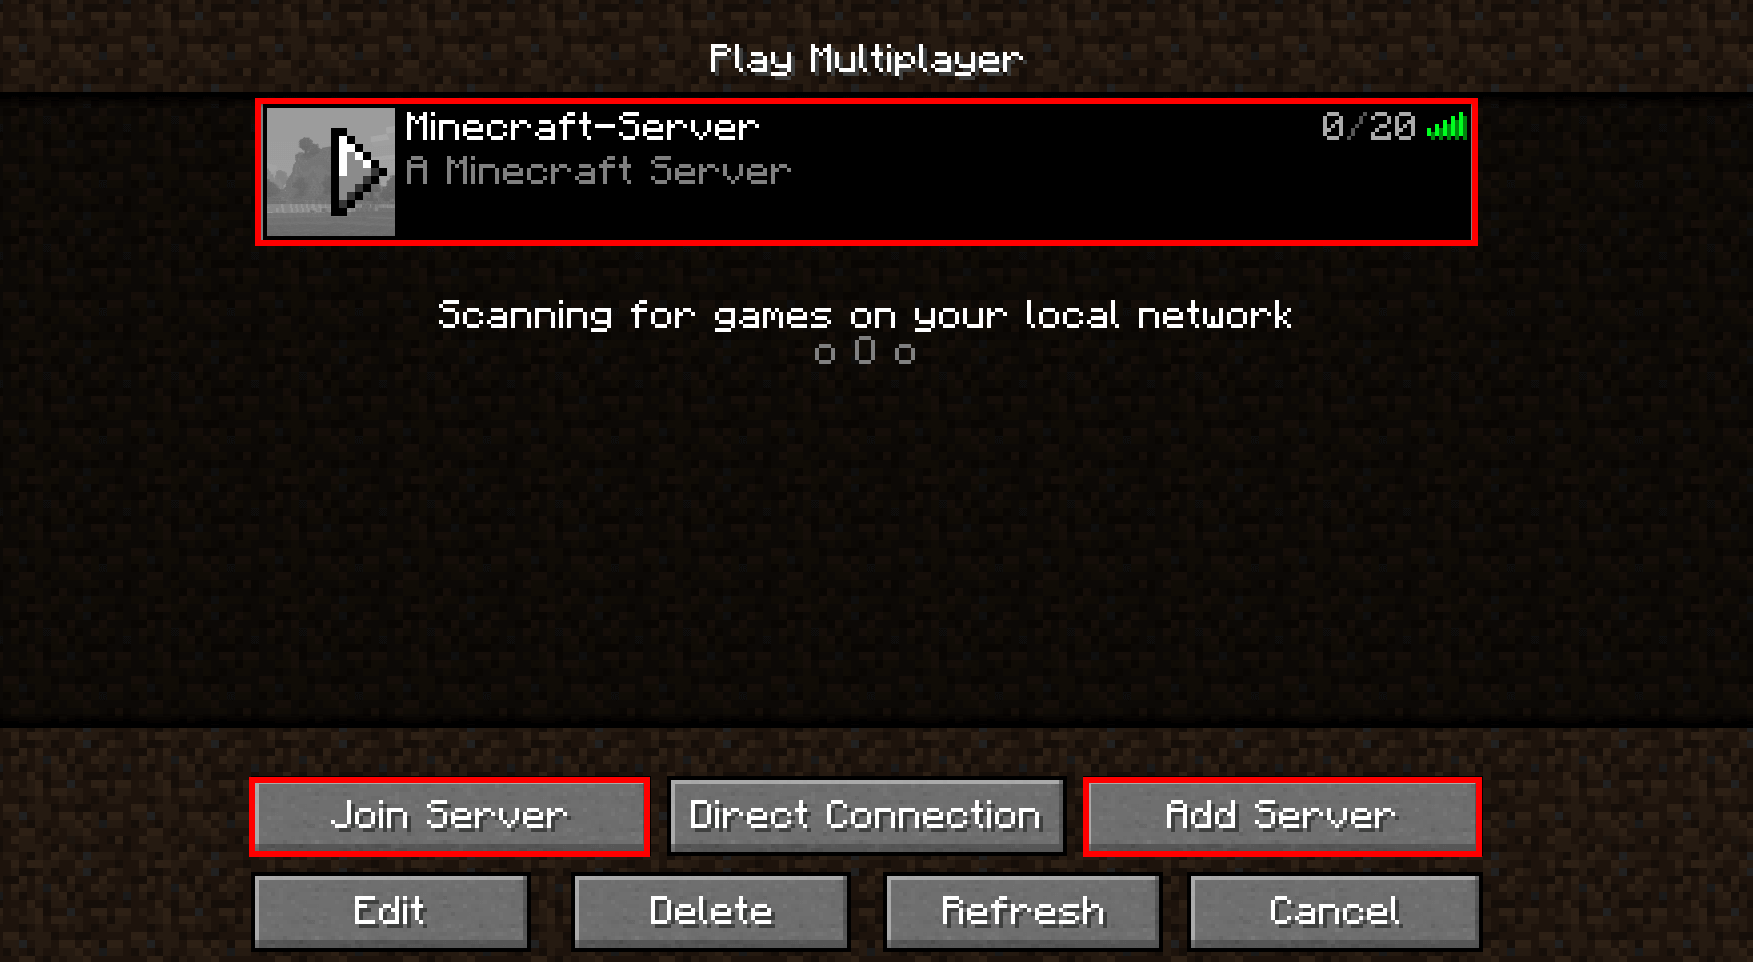
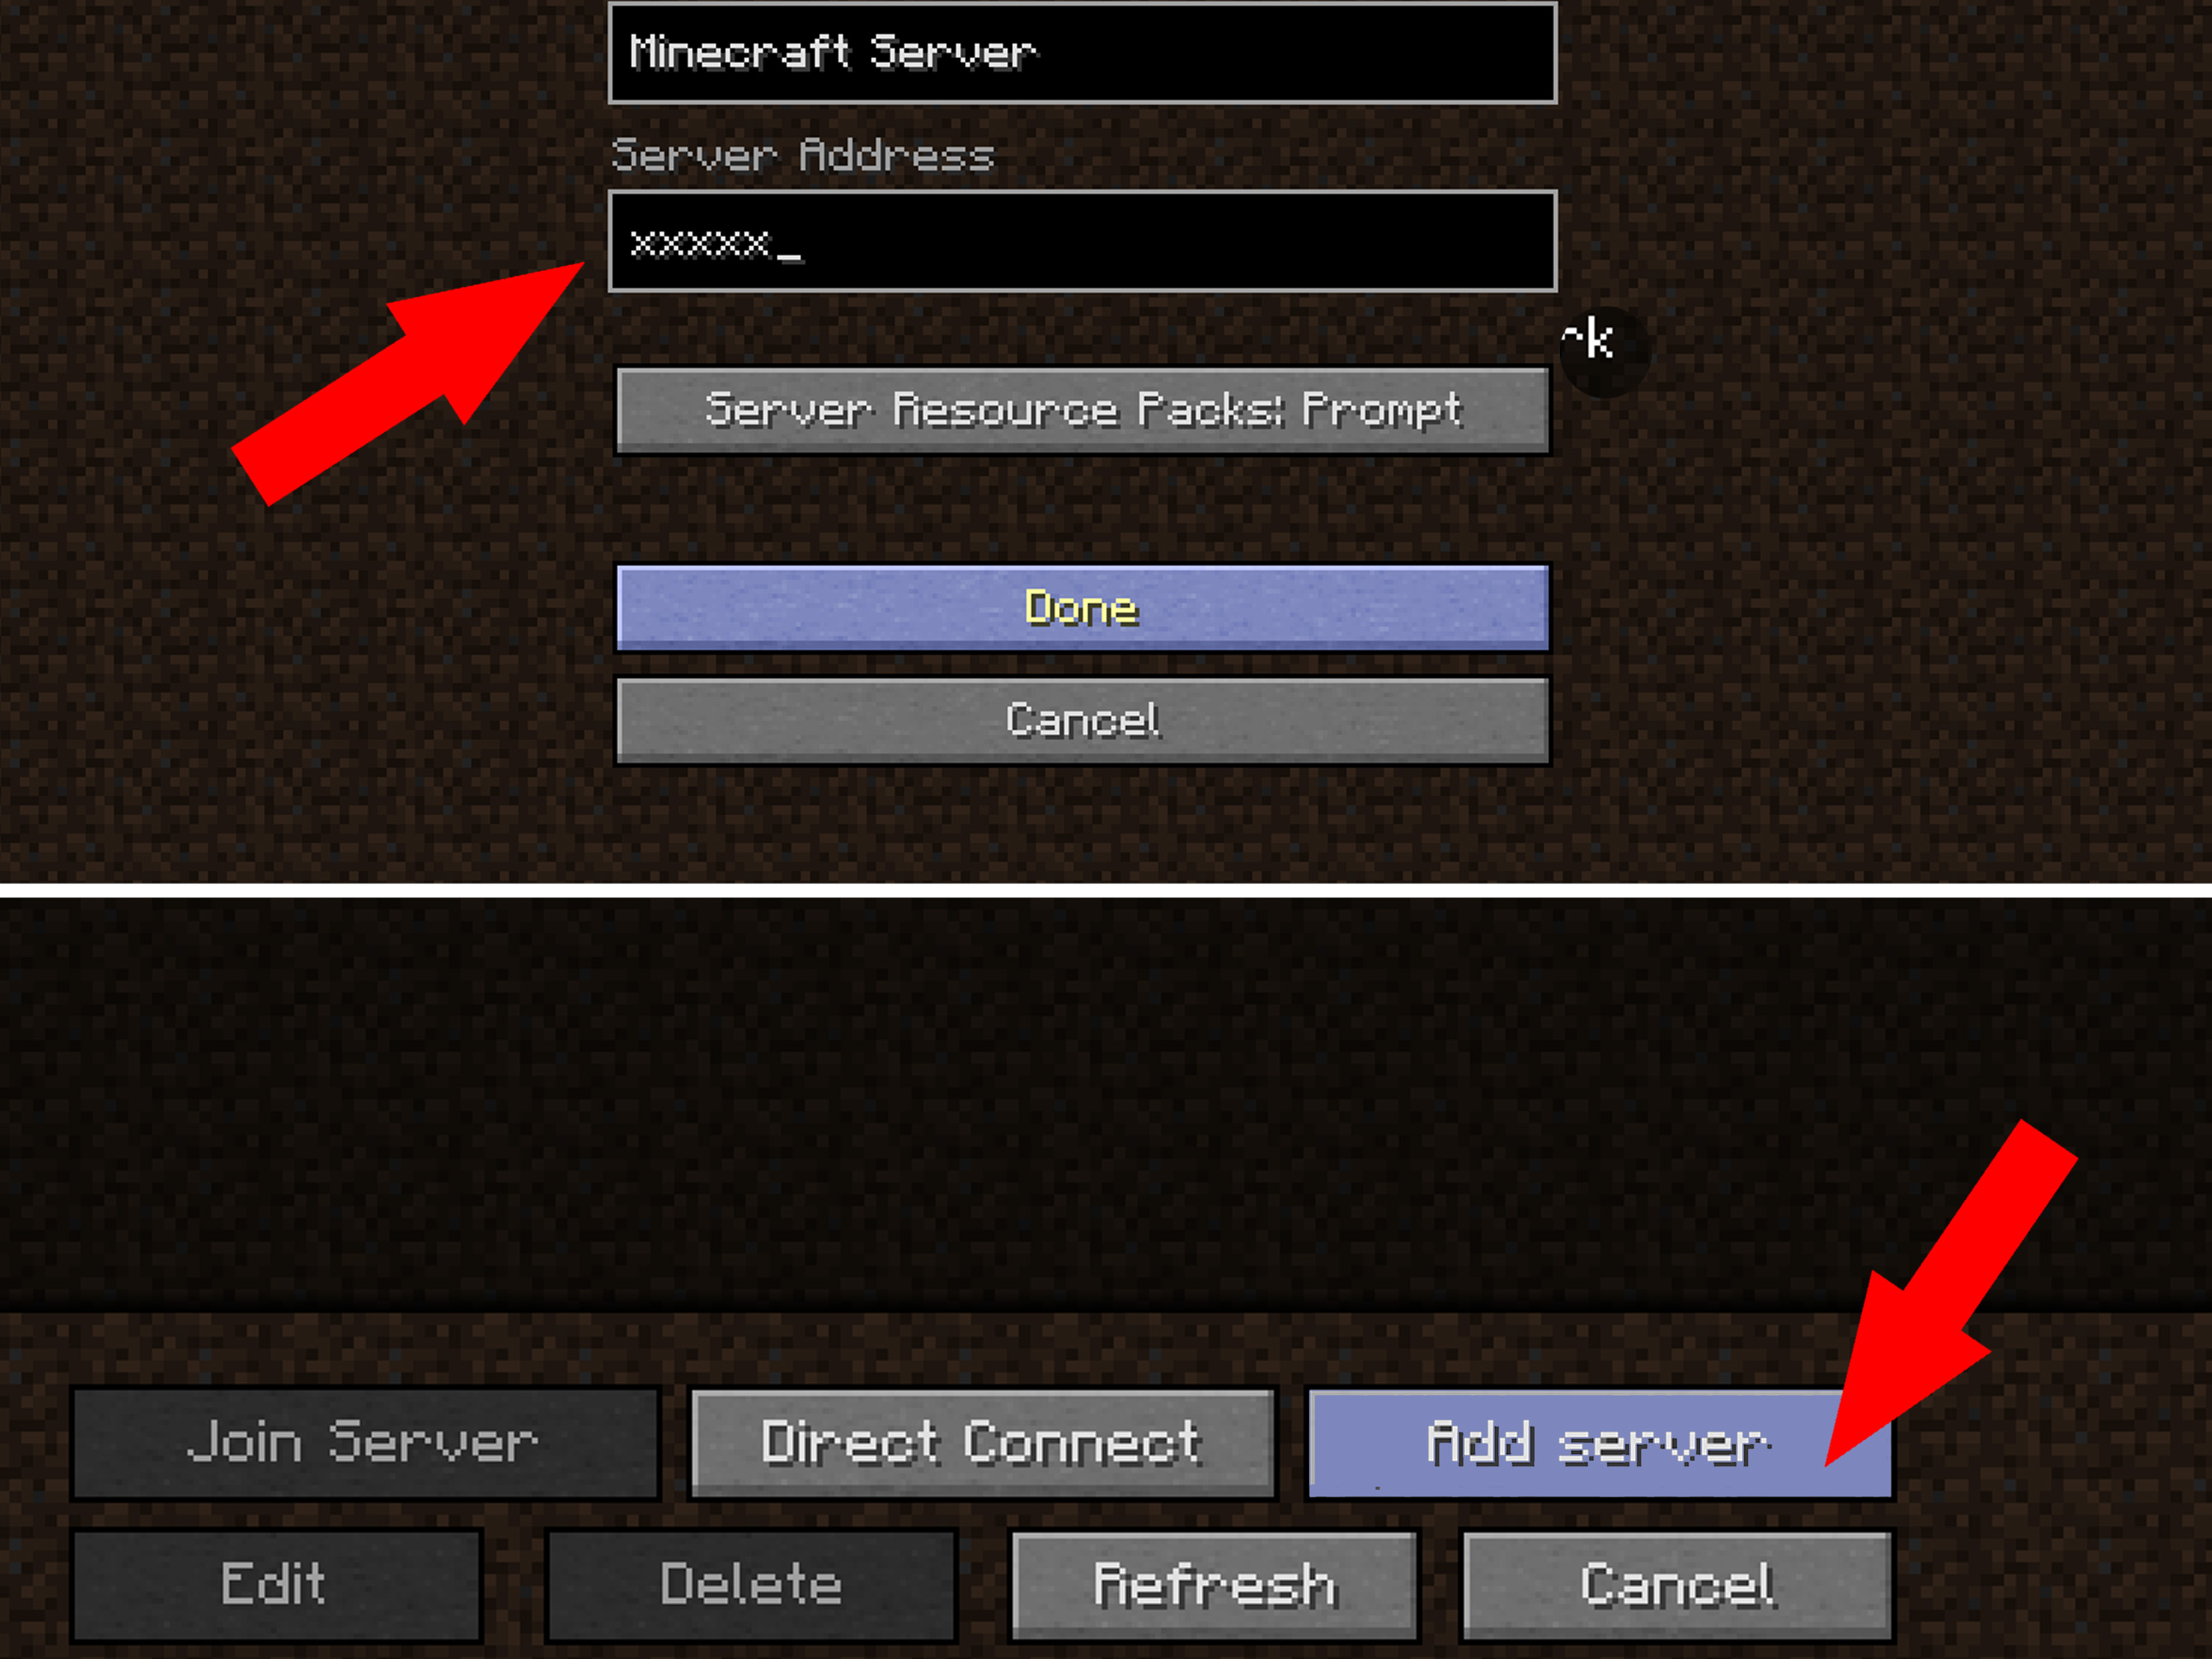
Step 6: Connect to the Minecraft Server
Once the Minecraft server is running, you can connect to it. You can do this by opening the Minecraft client and clicking on the “Multiplayer” button. Then, click on the “Add Server” button and enter the IP address of the server.
Step 7: Play Minecraft!
Once you are connected to the Minecraft server, you can start playing. You can build your own world, play with friends, or explore the world that has been created.
Conclusion
Creating your own Minecraft server is a great way to play Minecraft with friends and have your own unique world. It is a fun and rewarding experience, and it is a great way to learn about how Minecraft works.
This was very helpfull, I really apriciate it. Actually I was looking for something like this on the internet. All thanks for sharing this here. Thanks!!!!!!!
I have been wanting to create my own Minecraft server for a long time now. This guide was really helpful and easy-to-follow thanks a lot
Creating a minecraft server is easy, but maintaining is hard. I created mine fort ago still i face some problems. Need to learn more about its security.This guide was really helpful and easy-to-follow thanks a lot
Wow, this is a very informative guide. I’m sure it will be helpful for a lot of people. I have been playing Minecraft for years, and I have always wanted to create my own server. I will definitly try this guide. I have always thought creating your own minecraft server is very hard. But now I realise that this is not rocket science.
Lol. Creating a Minecraft server is a joke. You can create more than 100 server in just 1 hour. Who needs to step by step guide?
Creating a Minecraft server is like making a peanut butter and jelly sandwich. It’s easy and fun. You just need the right ingredients and a little bit of patience
This guide is outdated. I created a better server last year. If you are interested, you can watch my video. Link in bio.
I already know how to do this. I’m a Minecraft expert. I’ve been playing this game since it was released. I can create a server in my sleep.